Mailings
Do you plan to change an event location? Or you have a very important information to communicate? Mailing is an easy and quick way to keep in touch with your event audience.
How to create mailings?
Go to "Mailings" section.

Click “Add Mailing”.
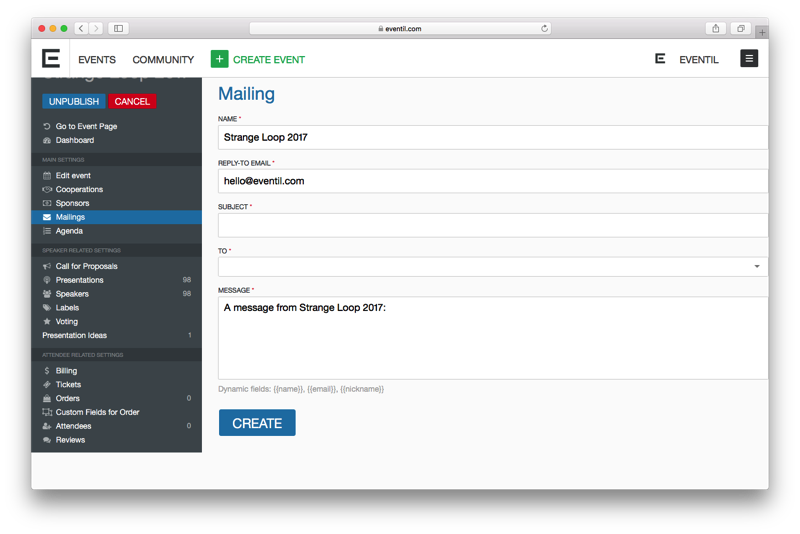
The name of your event will automatically appear in the “Name” field (we advise you to leave it that way - the recipients will know which event this mailing concerns).
Choose the reply-to email (your current account email will appear in the field automatically but you can change it to any other email) and enter your mailing subject (i. e. Event location changed).
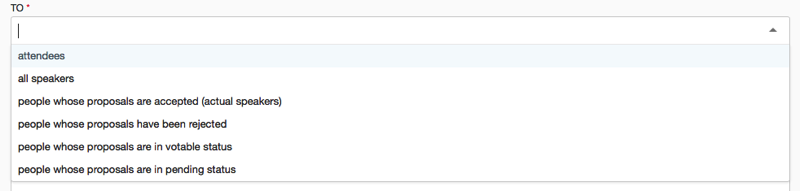
In “To” field you can choose to which group of people your mailing will be sent.
Write your message, enter the subject and click “Create”.
In “Mailings” section you can see the created mailing.
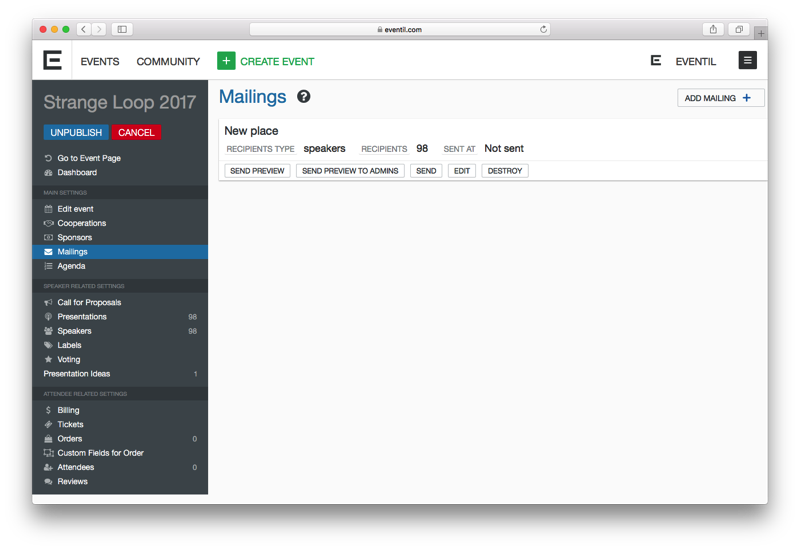
Next steps:
- send preview - it is good to check the mailing first, using this option you will send the mailing only to yourself
- send preview to admins - you will send the mailing to your event admins (you and people who you have assigned as admins, check “Cooperations”)
- send - the mailing will be sent to the chosen group
- edit - if you see the mistake or you want to change something, you can always edit your mailing
- destroy - you can delete the created mailing, take into account that you can’t destroy the mailing that has already been sent